

Most of us are pretty good at keeping the major things in our homes clean – the bathrooms, the floors, the kitchen, our clothes. These are chores that make themselves obvious when we don’t do them.
But what about the things we never think to clean? The kitchen sponge, light switch plates, pillows. Does it give you a little shiver just thinking about what’s underneath your refrigerator? Us too.
So let’s stop thinking about it and get cleaning.
1. Door Jambs, Knobs and Handles
It’s easy to overlook this part of your home, unless you have kids with jammy hands or dogs who like to rub up against the wood – then you know exactly how dirty jambs, knobs and handles can get.
We’re always surprised how even an already clean looking door jam brightens up with a quick swipe. Many of us may have been cleaning our door knobs and handles already, given our new habits around the pandemic, but if you live alone or just with a partner or spouse, maybe you haven’t thought about it much.
What you’ll need:
1. Cleaner. Just warm soapy water should do the trick, unless you’ve got some real marks on the paint. For those we love Mr. Clean Magic Erasers. In looking up the link we noticed that the ACE price is $3.99 for two, while Amazon is $6.05 for two. We’ve been seeing that a lot lately, so just a general PSA: check prices at other stores if you’re shopping on Amazon, because Amazon is often more expensive.
2. Rag. Just dip in the water and ring out.
If you want to use an alcohol spray on the knobs and handles, that’s fine too, just stay away from bleach as it’s not great for your paint if you color outside the lines.
2. Kitchen Sponge
Okay, this one seems redundant – the sponge is there to clean other things, therefore, it must be clean. Right? Maybe not so much. Sponges like to harbor bacteria, especially if they are left wet in the sink and not allowed to dry out.
Rule number one, thoroughly rinse and wring out your sponge after you use it and hang it somewhere to air dry. Keep in mind, many of the really cool looking sponge holders actually promote bacterial growth because they’re a little closed pocket with zero air circulation. Choose a holder with as much exposure for your sponge as possible. We love the iDesign Stainless Steel Suction Sink Center. We’ve tried several holders, and this one with its double cups sticks well and it’s got plenty of circulation.
Every few days, give your sponge a little bath. Put a dollop of your dish soap on your spong, fold the two ends towards each other and rub them together. Do this on both sides and give it a good rinse, then let it dry.
Replace your kitchen sponge every two to three weeks depending on how many dishes you do by hand.
3. Light Switch Plates
How many times have you thought to yourself, “Hmmm, I should really clean those,” but then by the time you’re done in the bathroom in the morning, you’ve forgotten all about your (let’s face it, probably dirty)light switch.
What you’ll need:
1. Cleaner. Windex, Clorox Clean-Up Bleach spray (if you’ve got wallpaper or colored paint, don’t use this product or any other bleaching product) or, our favorite – warm soapy water.
2. A thin rag or paper towel. We prefer a rag – it lasts longer and is tougher on sticky things.
3. An old, soft toothbrush. We’re going all in, so this is to get in the little crevice of the switch frame.
Use the cleaner sparingly and spray it on to your rag or toothbrush, not directly on the switch or plate. If you’re using the warm soapy water method, just dip your toothbrush or rag in and get rid of any excess water.
Clean away. Since switch plates are usually plastic (or sometimes ceramic) they clean easily. If you’ve got a fancy plate with lots of texture, as long as your toothbrush is soft, you can use it to get all the details clean.
4. Pillows
If your pillow is down, fiberfill, cotton or feathers, it can be washed in the washing machine. If you’ve got a memory or other foam pillow, we’ll get to that next. Front loading machines are better, but if you have a top loading machine with an agitator (the pole in the middle) that’s okay too – just use the delicate cycle and stand them up vertically if you can. With a front loader, just toss them in two at a time – in their own load – and wash with warm on the gentle cycle.
Read your label, but most pillows can be dried in the dryer – again, not foam. Use low to medium heat and shorter cycles, so you can fluff pillows and keep the filling from clumping together. Tennis, wool or other dryer balls are great for doing the fluffling for you.
Now, let’s talk about foam pillows. Using machines to wash and dry them can damage the foam, so you can either dust them generously with baking soda and let that sit for one to two hours and then vacuum it up, or you can fully submerge your foam pillow in a bath of warm water and gentle soap. If you go the latter route, you’ll want to gently squeeze and press your pillow a few times, turn it over, do the same and then repeat with two sessions of rinse water. Squeeze as much water out as possible and set to dry in a well ventilated area with a fan directed on your pillow. You can also dry them this way outside in the sun if you live in an arid climate. If it’s humid where you live, keep the drying inside.
5. Mattress
Mattresses are easier to clean than you’d think. Strip the sheets and mattress cover and toss them in the wash. Grab a box of baking soda and sprinkle it liberally on top of your mattress. Let it sit while your bedding washes. After 30 min to an hour, just vacuum up the baking soda. Dry your bedding, remake your bed and you’re done!
6. Ceilings and Walls (Seriously, they get dusty too.)
We’ve all seen those cobwebs in the corners and at the edges of the ceiling and the walls. Those are the obvious things we like to clean, but what about the dust on the walls themselves? Sounds silly, but think about your computer monitor, your TV, your windows. They all get dusty. We just don’t see the dust on the walls. If we’ve just grossed you out because you’ve never cleaned your walls before, we’re sorry, but at least now you know.
Our favorite tool for cleaning ceilings and walls is the Swiffer Sweeper floor mop outfitted with a dry cloth (includes dry and wet refills for $16.99 at ACE. Amazon is $22.99 for just the mop). But you can use any clean broom (this should be a dedicated wall broom) or a mop handle with a clean (and we mean brand new or only used for dusting your walls) mop head or rag. Just make sure only the soft towel touches your walls. We’re not out to create more work by scratching things up. Start on one side of the ceiling and each wall and work your way to the other in vertical strips, like you were painting the room.
7. Washer and Dryer
Rather like the kitchen sponge, you may be wondering why a washing machine needs washing. Well, if you’ve got a front loading machine, you may have noticed if you live somewhere with even the slightest amount of humidity (hello Half Moon Bay, Redwood City, San Francisco and everything in between) if you don’t leave the door open to let it dry out thoroughly between loads, your washer gets a moldy smell. That’s because it’s growing mold.
Clean your washer once a month, or every six to eight loads by running an empty cycle on hot with a ¼ cup of baking soda and vinegar each. To keep mold to a minimum, leave the washer door (on front loading machines) open between loads.
Dryers don’t mold, but they do gather lint. Clean your lint trap after every use and clean out your dryer vent once a year or every six months if you’re a heavy dryer family. Lou Manfredini, Ace’s Home Expert, shows you how to do it.
What you’ll need:
1. Vacuum with extension nozzle.
2. Screwdriver for removing the hose and outdoor vent hood.
3. Kit for cleaning out the lint from the hose and outdoor opening under the vent.
First, unplug your dryer or turn off the gas.
Pull it away from the wall so you can get to the dryer hose attached to the back. Remove the hose from the dryer – it will be attached with clips, a hose clamp or screws.
Most of the lint collects here near the elbow where the dryer connects to the vent. Vacuum the mouth of the vent at the dryer, then assemble your kit and use the long brush to capture and pull out the lint from the hose.
Next, go to the outside vent, remove the vent hood and use the brush and your vacuum to remove as much lint as possible. Button everything back up in reverse order, plug your dryer back in or turn on the gas and you’re good to start drying again.
We realize that was really two things, so we cheated a bit, but they’re a team, so we think it counts.
8. Refrigerator Coils (and under that fridge)
How can it get so dusty in a place no one uses? But we all know it does. We recommend cleaning the coils and underneath your refrigerator once or twice a year, especially before summer when they will have to work harder to keep things cool.
What you’ll need:
1. Vacuum with extension nozzle.
2. Screwdriver for removing cover plate.
3. Hand broom.
Let’s start with the front grill plate down by the floor. Pop that off and use the vacuum and brush to get all the dust and gunk off the grills. Then your use extension nozzle and get underneath the fridge. Not just on the floor, but on the sides and undercarriage of your refrigerator as well.
Next, you’ll need to pull your refrigerator out from the wall, being mindful if you have a water filter hose not to pull too far and disconnect it. Unplug your refrigerator. Depending on the model, your coils may be up high or down low and you may have a cover plate to remove. If you do, remove that and set it aside, keeping track of your screws. Using your vacuum and your hand broom, get as much of the gunk and dust off the coils as possible. Reattach your cover plate, plug your refrigerator back in and you’re good to go for another six months!
9. Lamp shades
We think about cleaning lampshades about as much as cleaning our walls, but the same principle applies. They still collect dust and it’s surprising how much better they look with a little zhuzhing.
What you’ll need:
1. Clean whisk broom or hand broom with stiff bristles.
2. Clean rag.
3. Vacuum with brush attachment.
4. Lint roller.
3. Warm, very lightly soapy water (optional and only for stains).
Remove your lamp shade, keeping track of the finial. Set it on a clean counter or other work surface with plenty of light so you can see what you’re doing. Take your broom and brush from the top down, working your way around the inside and outside of the shade. Repeat with the clean rag which helps remove very fine particles.
If you have a stain, you can use a rag and warm soapy water, but this is a last resort, as water can leave a stain of its own. This is not recommended for vintage or antique shades made of fine materials like silk. Take your clean rag, and dip it in a bowl of warm, soapy water. Ring out very well, then press with a dry towel to remove even more water. Using a circular motion, work your way over the entire stain. You may need several passes. Don’t scrub back and forth or use too much pressure. Repeat the entire process with a clean, damp rag. Let dry somewhere well ventilated.
10. Coffee Pot
This method isn’t for espresso machines or Keurigs. The vinegar isn’t good for their inner workings. Follow your manufacturer’s instructions for cleaning any complicated coffee maker. What we’re talking about here is your simple, straightforward drip coffee maker, which, incidentally, Martha Steweart thinks makes the best cup of coffee.
What you’ll need:
1. 1 Cup white distilled vinegar.
2. Water.
3. 1 Tablespoon Lemon juice.
Pour your vinegar and lemon juice into your coffee pot’s reservoir. Fill it the rest of the way with water. Turn it on and let it run through a brew cycle. Dump it out and run another brew cycle with just water. Smell any vinegar or lemon? Run one more cycle of just water.
If your pot has some mineral scale on it, pour a little more vinegar and a bit of lemon juice into a bowl and using a sponge with a scrubby side, wash the inside of your pot with the mixture. If the scale is persistent, you can add some baking soda to make a paste and let it sit for 15-20 minutes, then scrub again. Wash with regular dish soap, rinse thoroughly and make yourself a pot of coffee. You deserve it.
Have questions about how to do any of this, or need help getting the supplies together? You can use the live chat on our website, call or text us any time or drop on by and one of our helpful hardware team will get you set up. We’re here to help make your life easier.
We know there’s always something you need at the hardware store to complete your projects, even cleaning ones. Show this barcode at the register for 15% OFF any single item*.
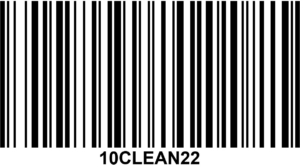
*In store only. Not applicable for online purchases at acehardware.com. Excludes sale items, prior purchases, services, rentals, gift cards, classes, ALL grills and grill brands including Big Green Egg, Weber, Traeger. ALL power tools and power tool brands, Milwaukee Pack Out Rolling Tool, YETI, STIHL, Cabot, Wavestorm, Stormblade, Lego, ALL outdoor power equipment, bicycles and paint. Hassett Hardware reserves the right to exclude any brands not listed here. May not be combined with other discounts or offers. This coupon does not apply in any way to any items, services, repairs, brands or sales at Powered by Hassett. In stock items only. Valid in store only. Other exclusions may apply. One time use only. Cashier will keep this coupon at checkout.